
Since I was hosting almost 40 people this weekend AT MY HOUSE for the twin’s birthday party, naturally I decided to tackle some big crafty redecorating projects this week instead of cleaning. What can I say, RaptorDad and I are awesome at panic cleaning.
First up on the week of insanity was hosting some of my girl friends for craft night. I spent Monday panic cleaning for that and didn’t manage to buy the supplies for the string art project I was planning. I did, however, have plenty of yummy snacks. Priorities people! Luckily, my friends are awesome and saved me from having to work on the babies’ stockings by helpfully sharing their supplies. They rock!
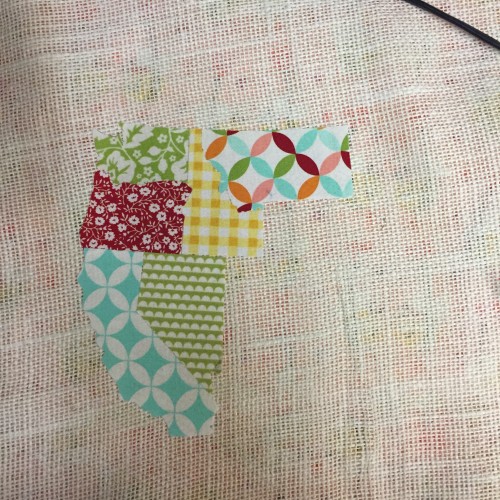
I don’t have many pics of the process, and they’re all from my iPhone, but it was pretty simple. 🙂 We started with a printout of an outline map of the US. It was printed on 4 sheets of paper which were taped together. Starting on the West Coast, you first cut the state out of paper. Then you iron on some iron on stuff to the fabric scrap you’re using. Flip over both the state and the fabric and trace the shape onto the back. It will be a mirror image.

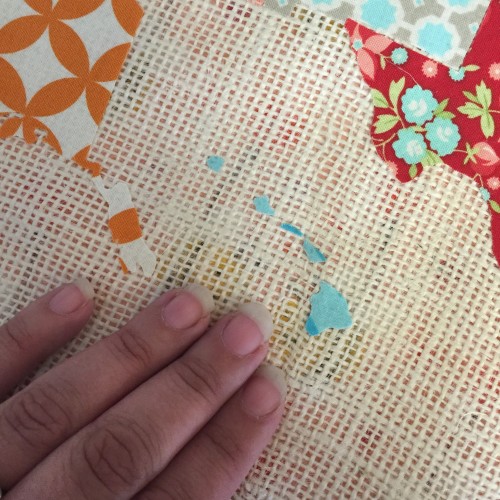
I actually have a picture of this step! With states that were in multiple pieces (Michigan and Hawaii) I cut them out of one pice so that the pattern would match up. I didn’t the first time and it drove me crazy so I ended up ripping it off and redoing it.
Then you just cut out along the outline (I cut just inside of it), peel the backing off of the fabric and position it in place using the rest of the paper map as a guide.
See! The pattern lines up perfectly. I’m not OCD at all, why do you ask? 😉
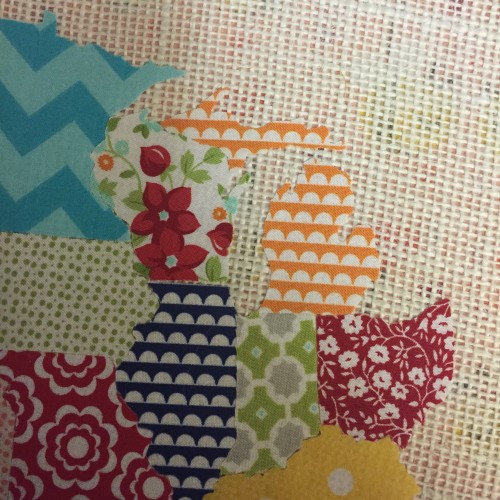
I can totally see why you start on the West Coast. You make progress so fast! All of the states are big and there are a bunch of straight lines. By the time you get to the East Coast, you’ve made enough progress that you’re motivated to keep going. 🙂
You’re technically supposed to stitch inside all of the states, but I just couldn’t figure out how that was going to work on a state like Hawaii. I could barely cut the islands out! Confession, I totally left 2 or 3 off that were just too small. And I left all all of the islands along the coasts. Sorry Florida Keys. I decided just to frame it behind some glass instead. Hopefully the pieces don’t fall off, but I figure we’ll cross that bridge when we come to it. I will say, I think the stitching would look awesome in the western half of the map with all of the bigger states so if you decide to do this project with something other than the states I would consider adding the stitching.
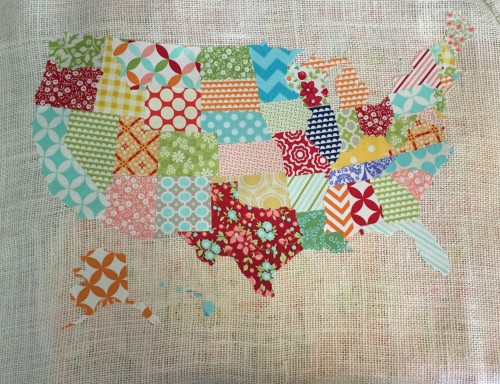
All in all, I am super happy with how it turned out! I started it on a Monday and finished up up Friday night. I knew that if I packed it away, it would take me forever to get it back out so I just left the huge mess taking over our kitchen table and worked as fast as I could.
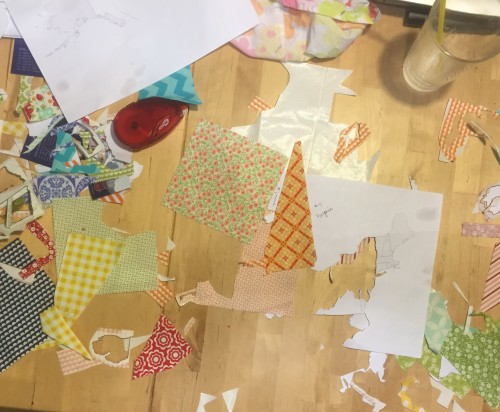
Fabric scraps everywhere! But it was such a fun, EASY, project. And it was super nice to get out of my comfort zone and try something totally new. I think I’m going to be exploring some more new crafts! I love scrapbooking, but it was fun to play with fabric. Who knows, maybe I’ll finally take up quilting. 🙂
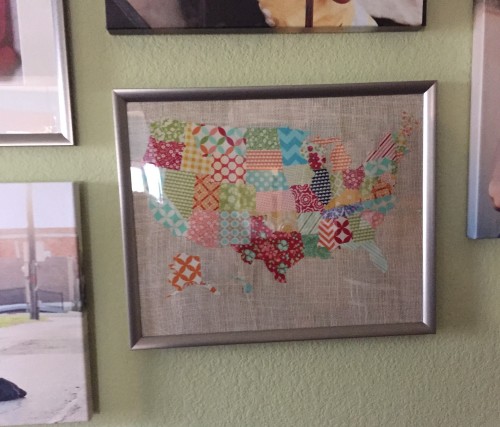
Sorry for the wonky angle; I was trying to minimize the glare. I love it! I threw up a temporary gallery wall because I wanted some new stuff up before the babies’ party. I plan to make a few more crafty things for this wall, potentially order a few more pictures, and then redo the whole thing. But I’m loving it for now. 🙂